Windows Installation Instructions

Antivirus required to connect. Please click here for details.
SUPPORT NOTES
  • Do not use these manual installers on LLNL-managed computers; use Portal Manager or MacPatch instead.
  • GlobalProtect will open your system default web browser to complete the authentication process.


Palo Alto Networks GlobalProtect Client

Setup Instructions

NOTE: The appearance and verbiage of the pictures below may change over time as we improve them for clarity/etc.
  1. You need to install this client as Administrator. Navigate to the folder where you saved the downloaded file and run as Administrator. When you open the file the GlobalProtect Client Setup Wizard screen appears.
  2. Run the installer, click "Next", "Next," "Finish" etc. to accept the defaults:
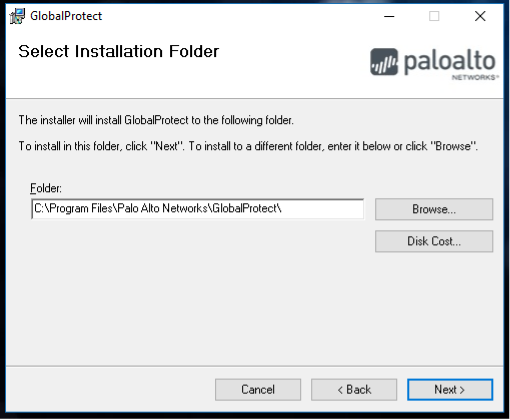


  3. Once the software is installed successfully, the GlobalProtect VPN window should pop up automatically. If not, click the small arrow in your taskbar (lower-right corner of your screen) and click the grey GlobalProtect "Globe" icon. Click install to begin the installation.


  4. In the GlobalProtect window, enter the LLNL VPN portal address: gpvpn.llnl.gov Click ‘Connect.’


  5. To log in, enter your OUN in the Username field and your OTP (PIN + token code) in the Password field.


  6. If your computer connects successfully and you pass the antivirus software enforcement check, you should get a notification letting you know that you connected successfully. The following notification will appear:


  7. If you do not pass the antivirus software enforcement check, you will not be able to reach any LLNL resources and will receive a pop-up window instructing you to remediate your computer and reconnect:


  8. To disconnect the GlobalProtect VPN software, click the "Globe" icon in the system tray, then click the "Disconnect" button.


Cisco AnyConnect

Setup Instructions

  1. You need to install this client as Administrator. Navigate to the folder where you saved the downloaded file, click on the folder to select it, then right click on the folder to reveal the context menu and click "Extract All".


  2. In the window that opens with the path to extract, click on "Extract". Make sure the Show extracted files when complete box is checked.

  3. In the next window that opens, find the Setup.exe file and double click on it.

  4. Click "Yes" on the User Account Control window to install the software. Failure to accept this window will cancel the installation and will need to restart at step 3.

  5. In the windows that opens up, choose Core & VPN and then click "Install Selected".

  6. A window will appear asking to confirm the installation choices, click "OK".

  7. In the next window, click "Accept"

  8. Wait until the install is complete.

  9. Once the install is complete, a window will appear denoting that the install is complete. Click "OK" to close the window.

  10. Click on the Windows Button (1) and then search in the search bar: "Cisco", select "Cisco AnyConnect Secure Mobility Client", then click "Open".

  11. This will open the AnyConnect Client window. If the URL is not filled in, enter: vpn.llnl.gov

  12. Choose the correct group and enter your OUN and OTP (PIN + Token Code)

  13. Once you have successfully launched the Cisco AnyConnect Secure Mobility Client, you will receive the warning banner. You must accept the terms by clicking "Accept" to fully connect.


  14. After some checks are performed, you are connected.

    1. If an error occurs, it is likely that there is no antivirus. SEP is the supported LLNL Antivirus, instructions here: SEP Install

  15. To disconnect from the Cisco AnyConnect Secure Mobility Client click on the AnyConnect icon on your notification area and select disconnect.
  16. To find the client again, look in the toolbar near the time, and the AnyConnect icon will be in the tray.

GlobalProtect Client

Setup Instructions

NOTE: The appearance and verbiage of the pictures below may change over time as we improve them for clarity/etc. While we endeavor to keep these instructions clear and up-to-date, Palo Alto Networks also provides regularly-updated instructions at their own site:
Palo Alto Windows Installation Instructions
Using Connect-Before-Logon
Using GlobalProtect
  1. You need to install this client as Administrator. Navigate to the folder where you saved the downloaded file and run as Administrator. When you open the file the GlobalProtect Client Setup Wizard screen appears.
  2. Run the installer, click "Next", "Next," "Finish" etc. to accept the defaults:


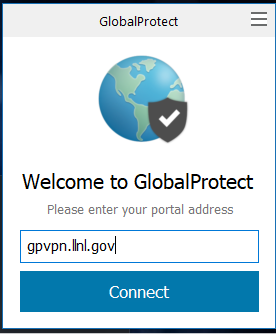
  3. Once the software is installed successfully, the GlobalProtect VPN window should pop up automatically. If not, click the small arrow in your taskbar (lower-right corner of your screen) and click the grey GlobalProtect "Globe" icon. Click install to begin the installation.


  4. In the GlobalProtect window, enter the LLNL VPN portal address: gpvpn.llnl.govClick "Connect".


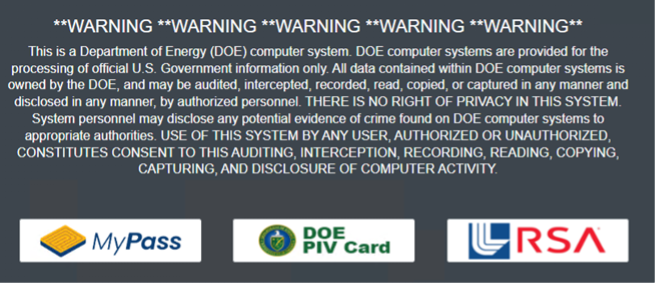
  5. A login window will now appear in your default web browser. Select whichever option is most convenient for you, and one that corresponds to a device you already have (i.e., don’t choose ‘DOE PIV Card’ if you don’t have one).
    • MyPass
    • DOE PIV Card (badge with embedded chip)
    • RSA (SecurID, also known at LLNL as the One-Time Password, or OTP)


  6. If you choose RSA, enter your OUN in the Username field and your OTP (PIN + token code) in the Password field that appears on the next screen. Proceed to step 7.
    If you choose MyPass or PIV, you will be prompted to select the proper certificate:
    • For MyPass, choose the certificate with your official username somewhere in the subject.
    • For PIV, choose the certificate with your name in uppercase letters. It might also say ‘Affiliate.’
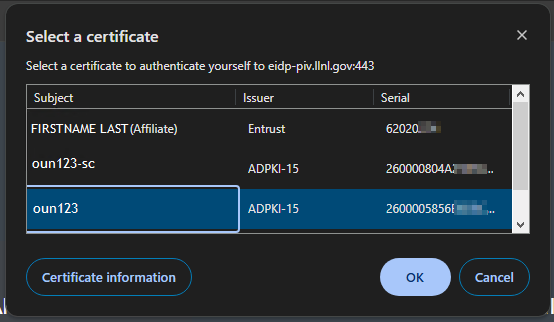

    A window showing a dialog box to select a certificate.

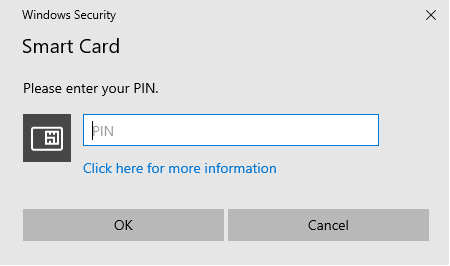
    1. Enter your PIN and press OK/Continue:

      A Windows Security prompt showing a dialog to enter in the user's PIN.

      NOTE: If you are using Firefox and not getting a prompt for a valid certificate, you may be able to resolve your issue by going to “Settings > Privacy & Security > Security > View Certificates… > Authentication Decisions” , select any value where the host contains the term “eidp” and Delete, then reload your browser/reboot and try again:
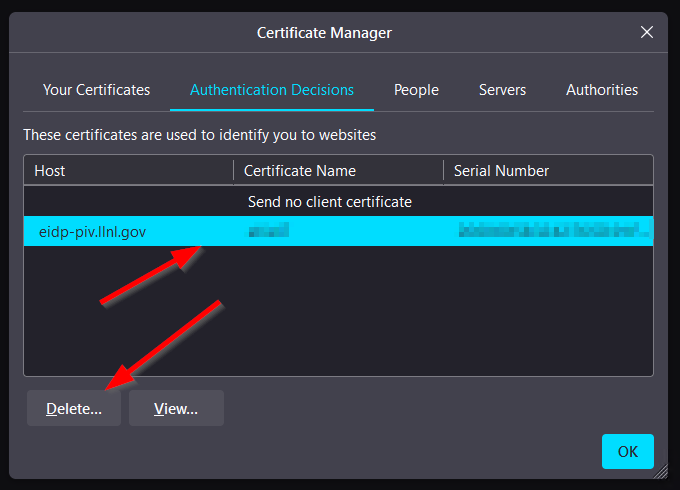
      A dialog box showing a list of certificates for a user to delete

  7. Once you authenticate successfully, your browser will display the following window:
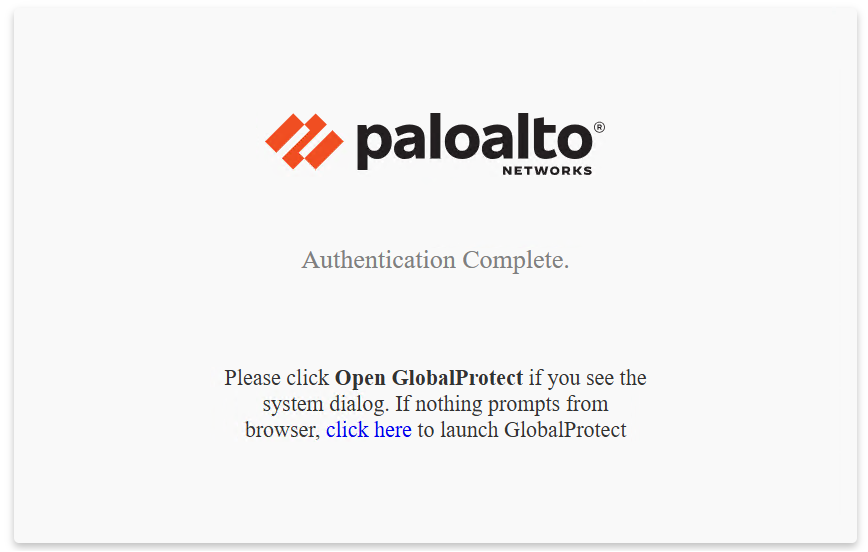
    An alert from Palo Alto Networks that confirms authentication was successful

    Follow the instructions given and select “Open GlobalProtect” if you see a system dialog prompt (at which point you can choose to Always Remember) or click the “click here" link to launch the GlobalProtect client and complete the connection.

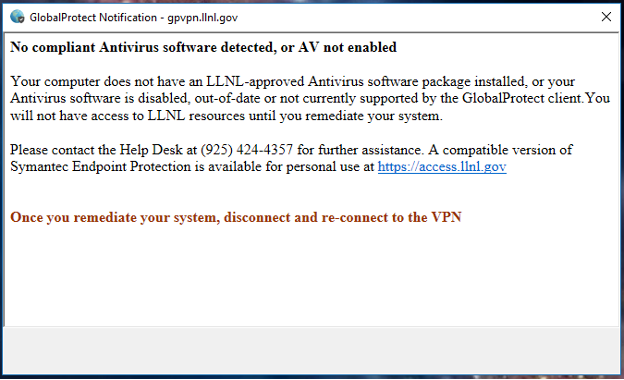
  8. If you do not pass the antivirus software enforcement check, you will not be able to reach any LLNL resources and will receive a pop-up window instructing you to remediate your computer and reconnect:


  9. To disconnect the GlobalProtect VPN software, click the "Globe" icon in the system tray, then click the "Disconnect" button.